-27 Dec 2014-
The legs have to match the existing armour. |
 |
 |
 |
Here are some samples:
Suit 1
Landeszeughaus, Graz 1557
|
 |
Here are some samples:
Suit 2
Landeszeughaus, Graz 1510
Armour Mark: Hans Maystetter
|
 |
-3 Jan 2015-
This is the knee-cop for the leg armour. |
 |
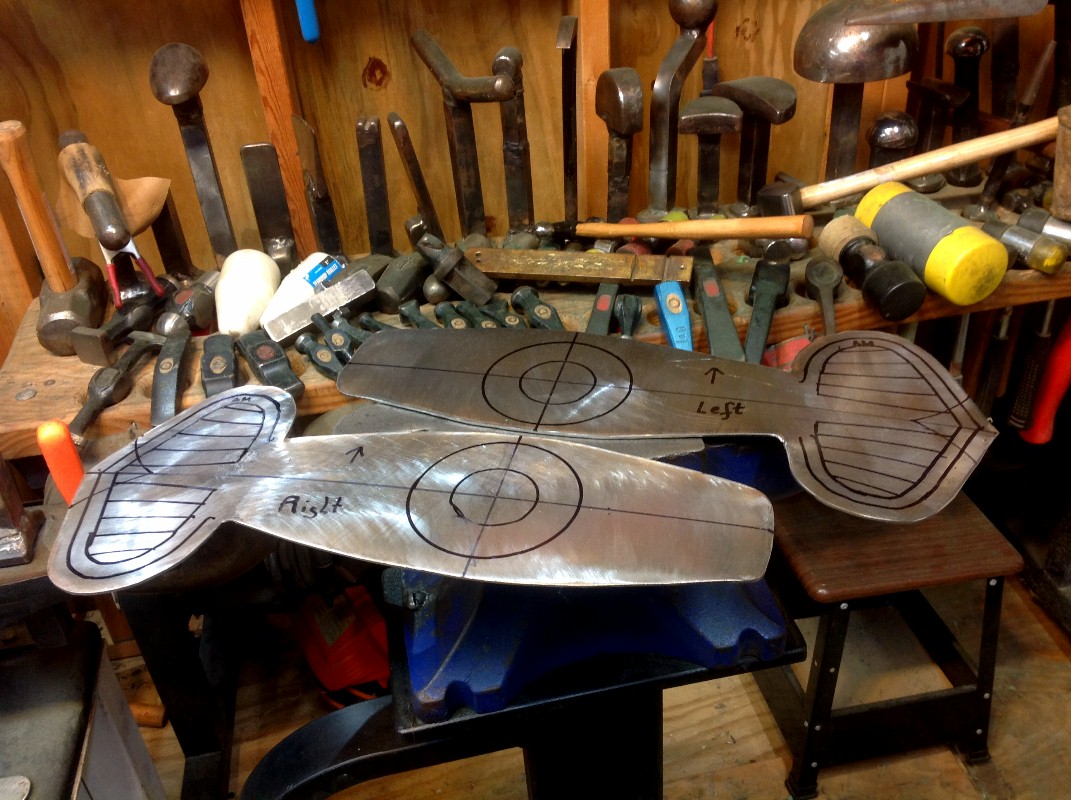
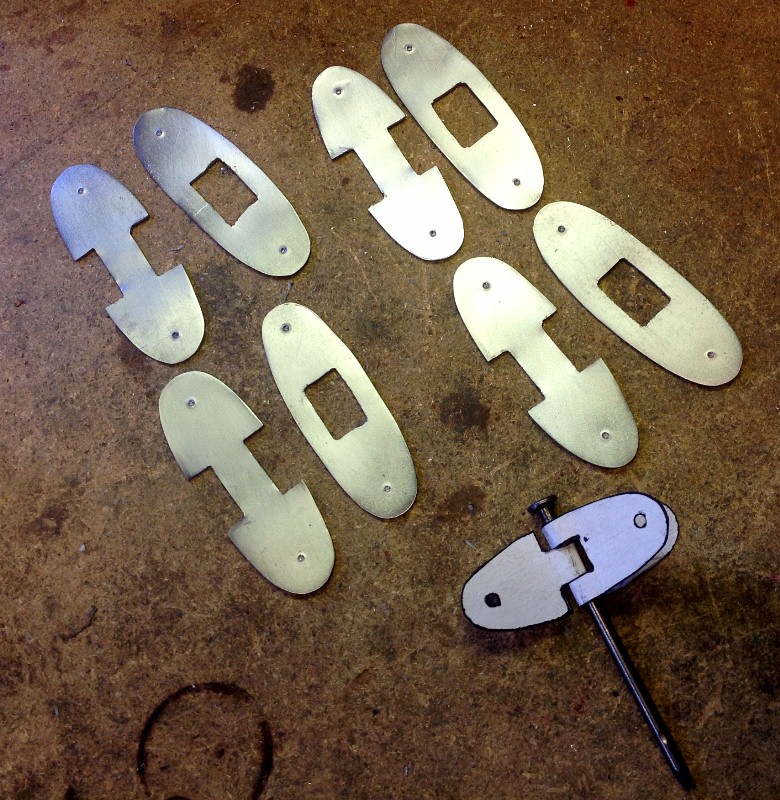
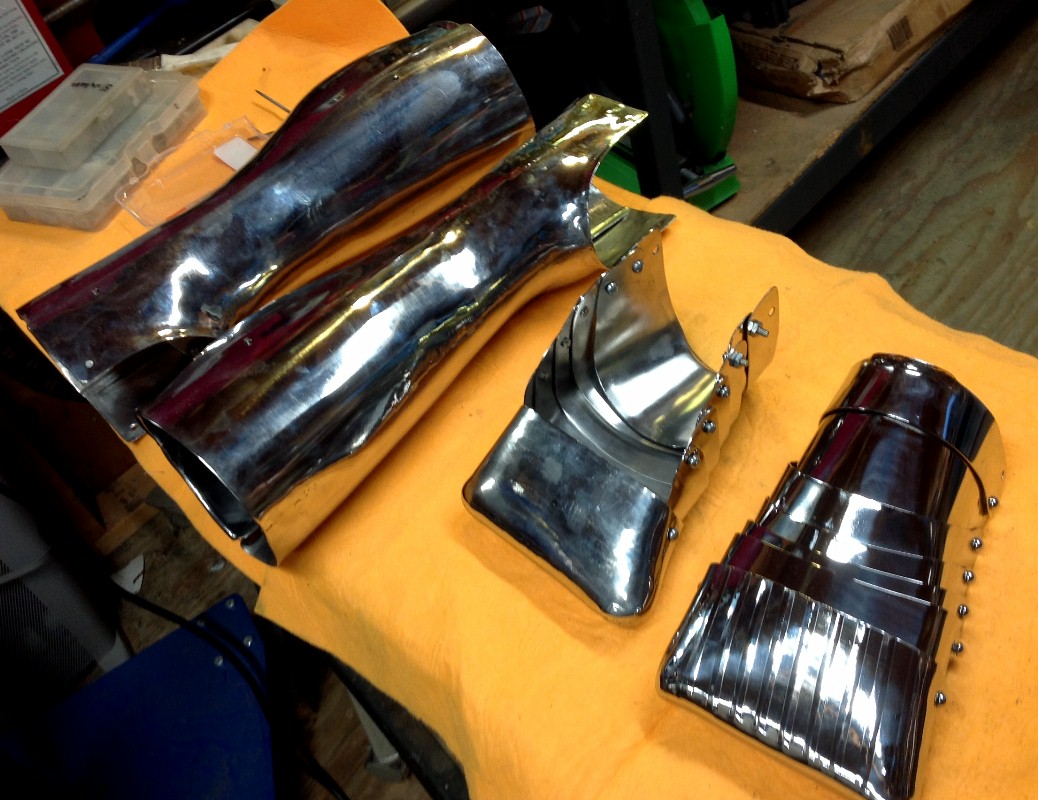
-13 Jan 2015-
These are the knee-cop in 14ga. steel, the cop will be hot raised. |
 |
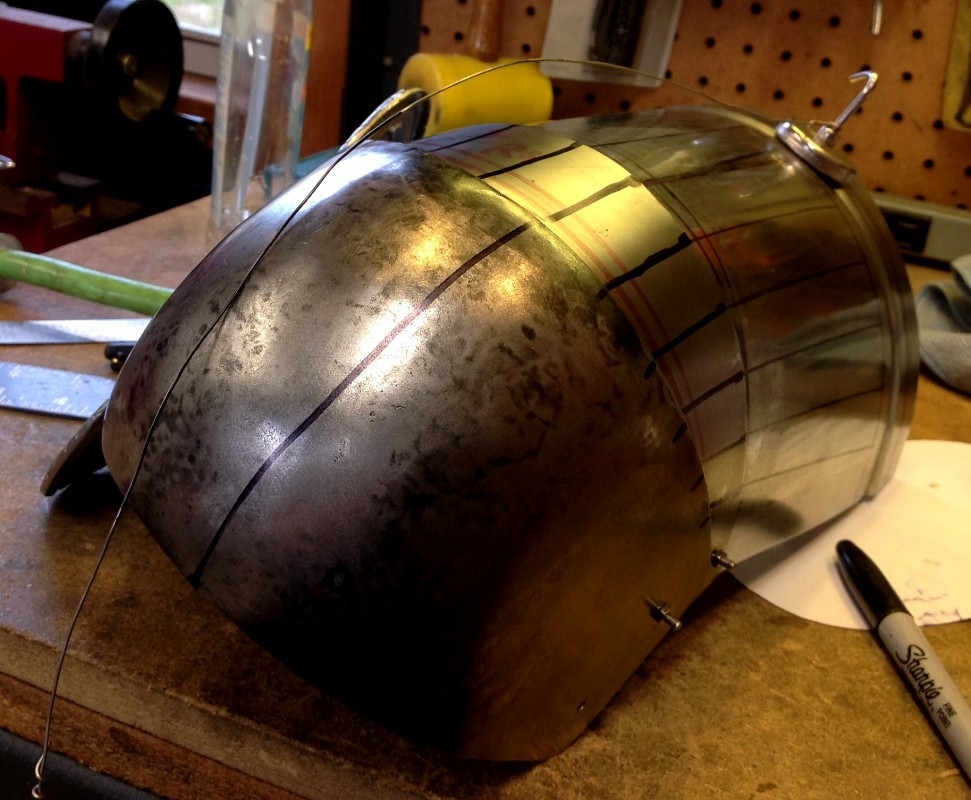
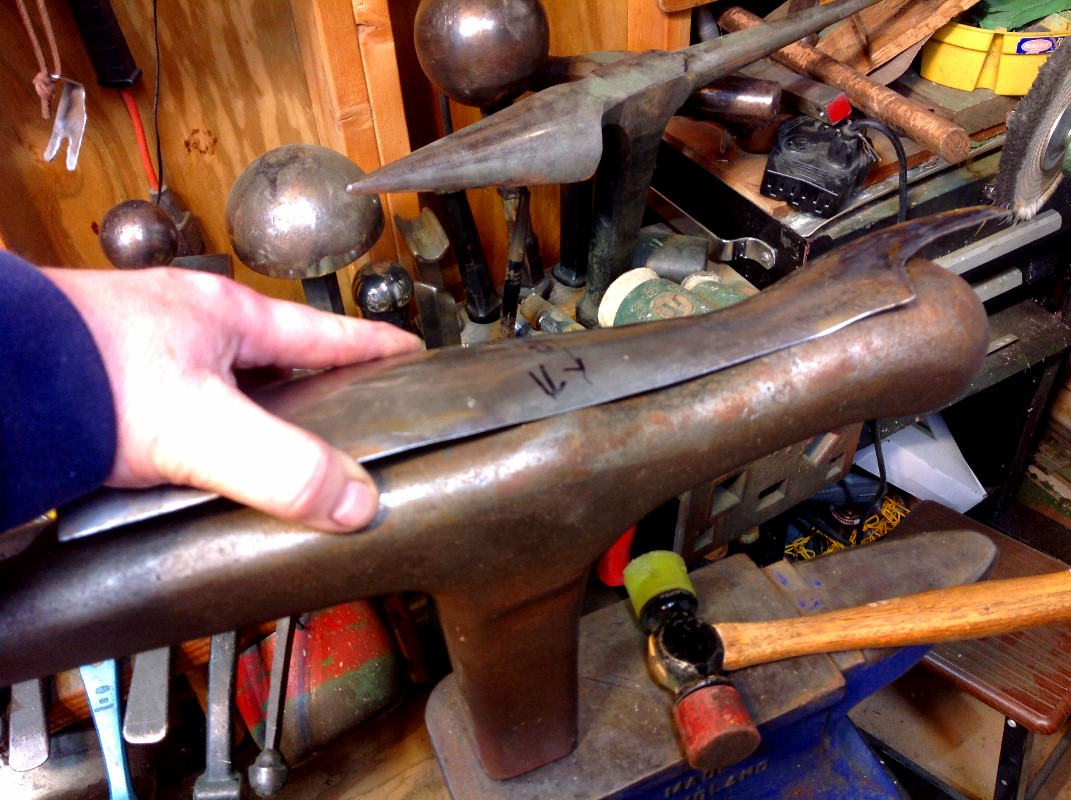
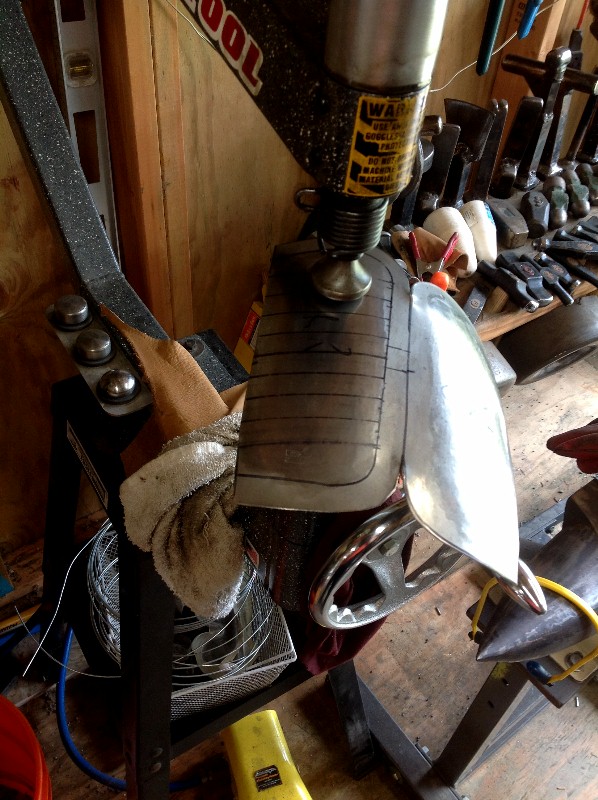
-14 Jan 2015-
The knee-cop lame in the pneumatic hammer to start the raising. |
 |
This is after 5 min., keep in mind this is 14ga. steel. |
 |
| Now it takes heat to keep on raising the cop. |
 |
Now I plannishing the cop. |
 |
-15 Jan 2015-
Working on the knee-guard, slow but it is getting there. |
 |
 |
 |
-16 Jan 2015-
Made a new left knee-cop, did not like the form of the old one. |
 |
. |
. |
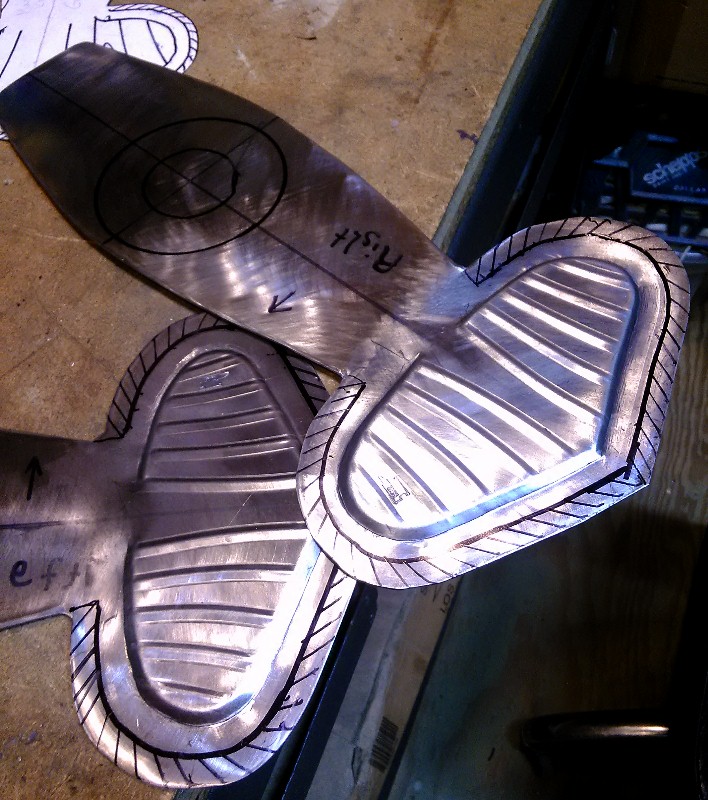
-19 Jan 2015-
Now you can see why I made a new knee-cop, the elegant lines on the off-set. |
 |
The off-set brings out that look, which gives it a good feel. But it is a lot of work. Keep in mind nothing is cleaned up. |
 |
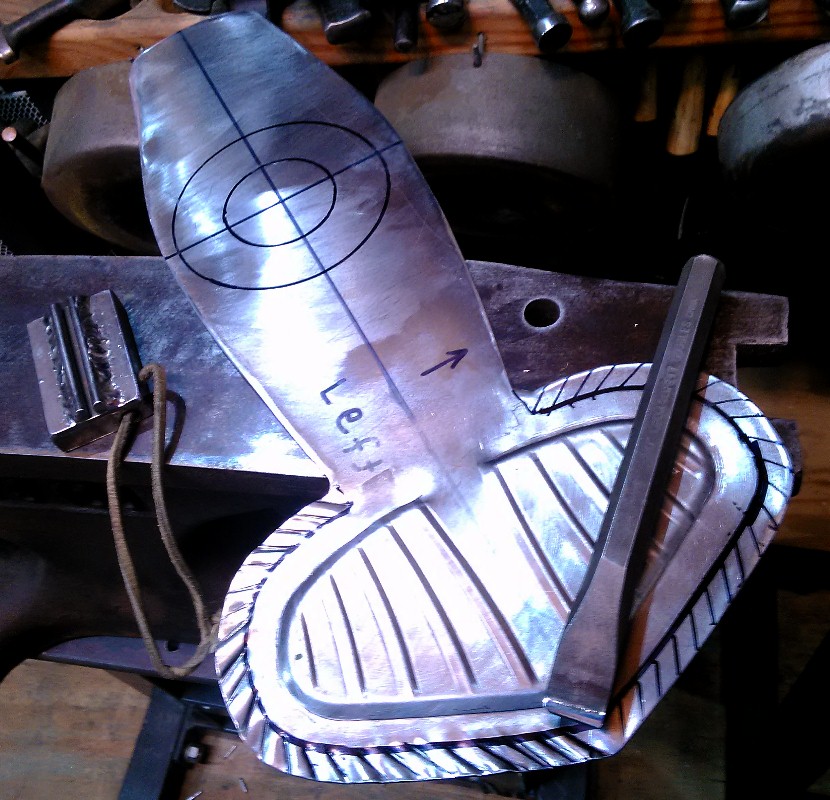
-20 Jan 2015-
The art for the roping. |
 |
Setting the lines. |
 |
-21 Jan 2015-
Placed the burring on the edge, this is all raw with no clean-up. |
 |
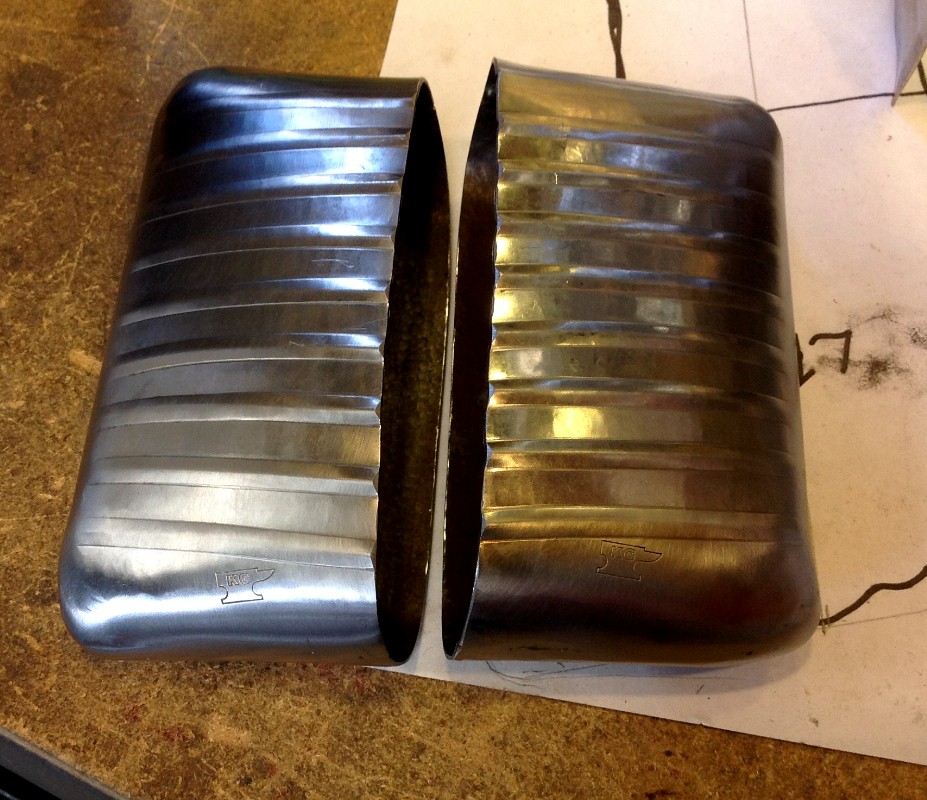
-24 Jan 2015-
The general look after clean-up. Top one is done, the bottom one is next. |
 |
-27 Jan 2015-
Planishing the knee-cop. |
 |
Working on the second knee guard to match the set. |
 |
-28 Jan 2015-
Working the second knee-cop. |
 |
Working on the second knee-cop to match the set. |
 |
-29 Jan 2015-
Planishing the cop with the pneumatic hammer. |
 |
Close-up. |
 |
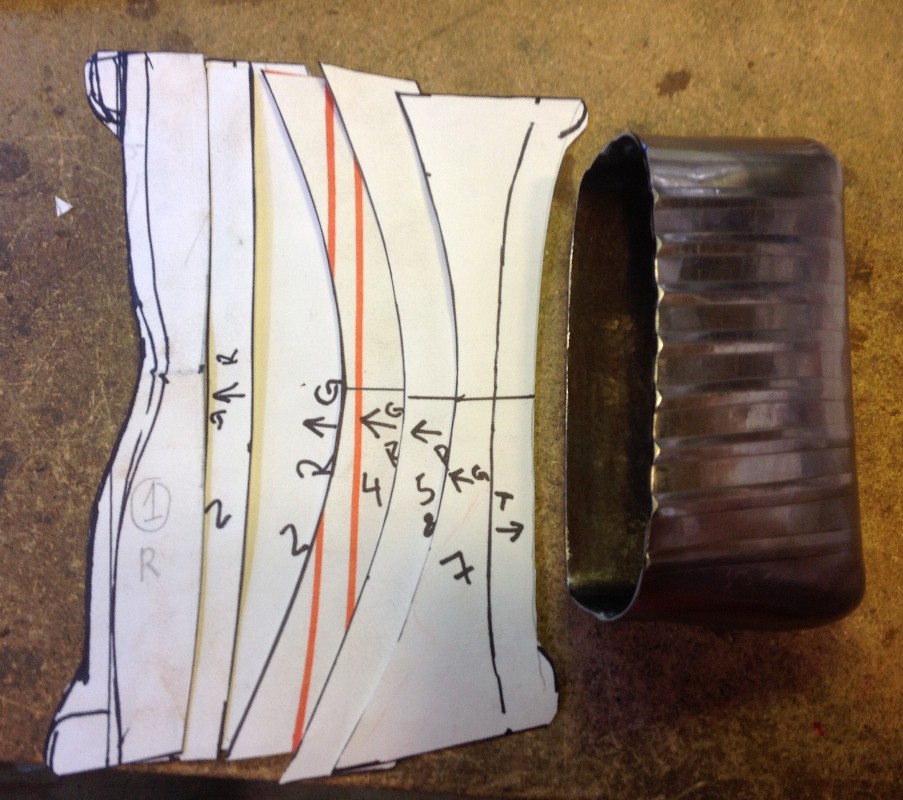
-31 Jan 2015-
Designing the lames for maximum mobility on the knee-cop. |
 |
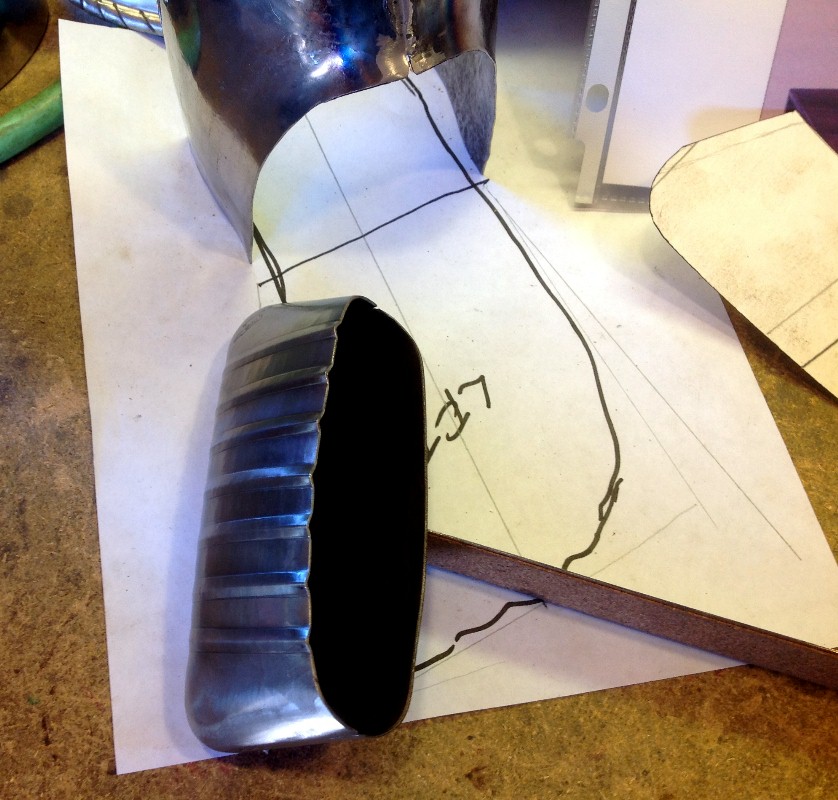
The function of the paper model is to see the range of mobility, this will allow the wearer to sit on his/her calf muscles. |
 |
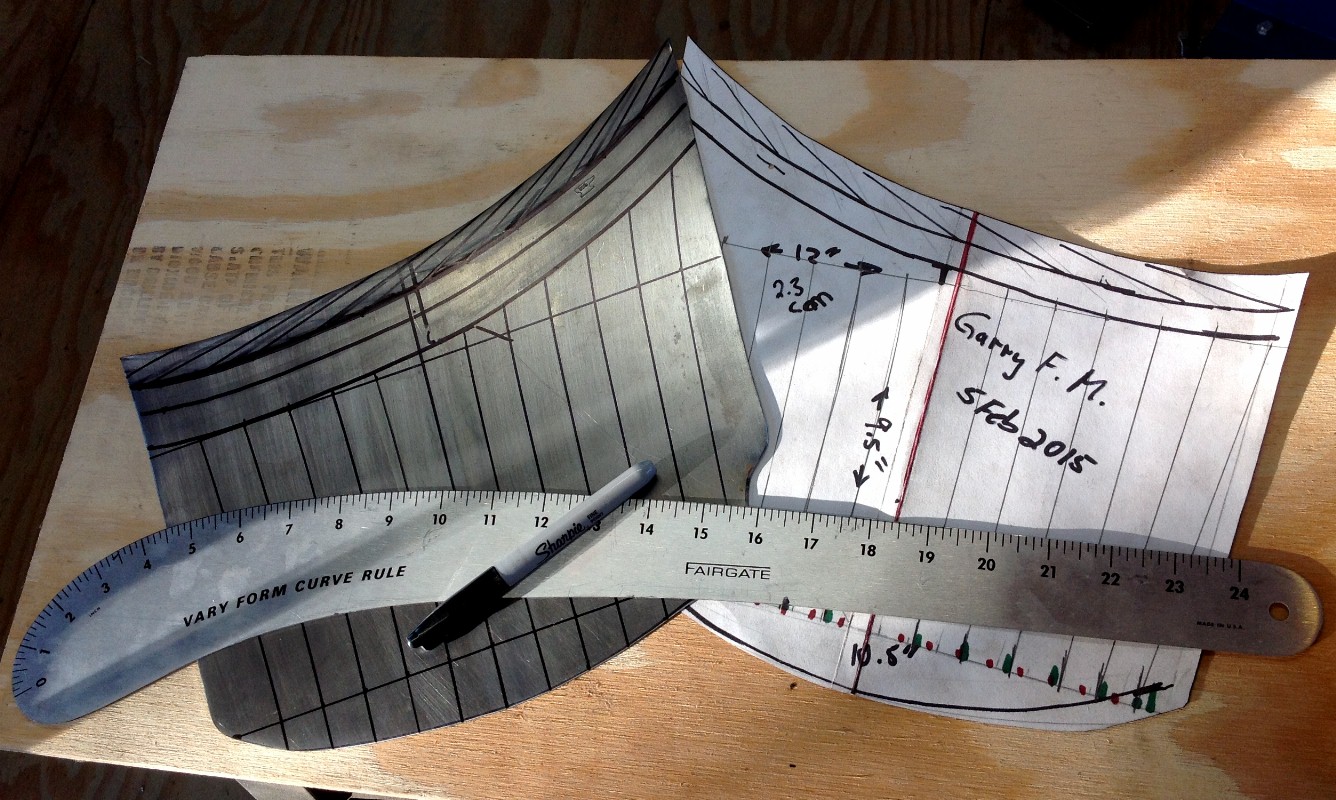
-3 Feb 2015-
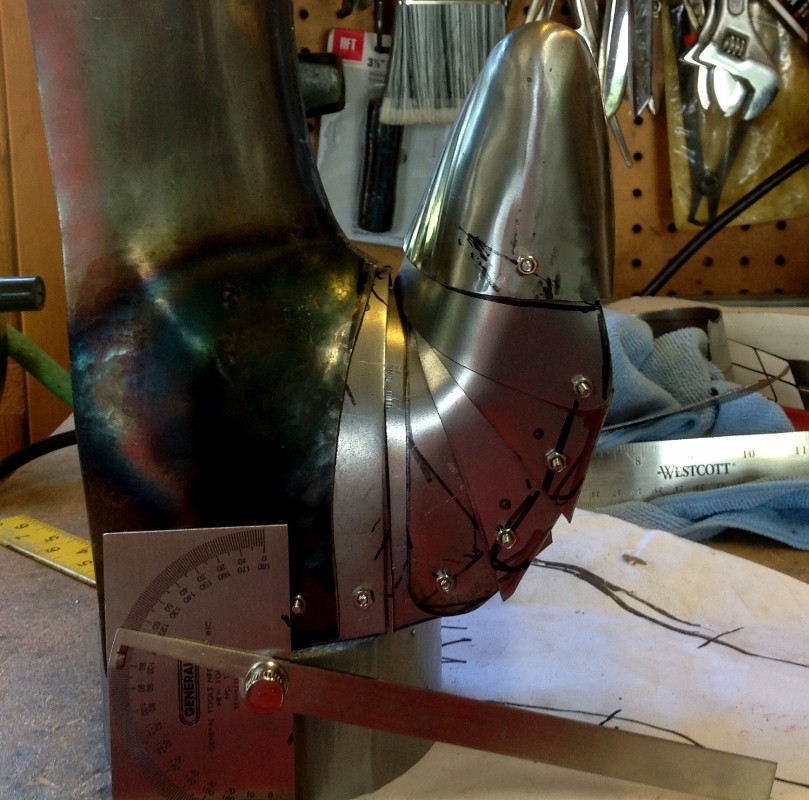
Knee-cop closed. The little lip on the bottom lame is for the pin which will be on the greave. |
 |
Knee-cop open. |
 |
-4 Feb 2015-
The first Lame.
 |
The Lame in the cop.
 |
The Lame pulled out.
 |
Side view with the Lame out.
 |
-5 Feb 2015-
Working on the Cuishe. |
 |
 |
 |
-6 Feb 2015-
Lines for the roping. |
 |
Chiseling the roping. |
 |
| General idea. |
 |
Second view. |
 |
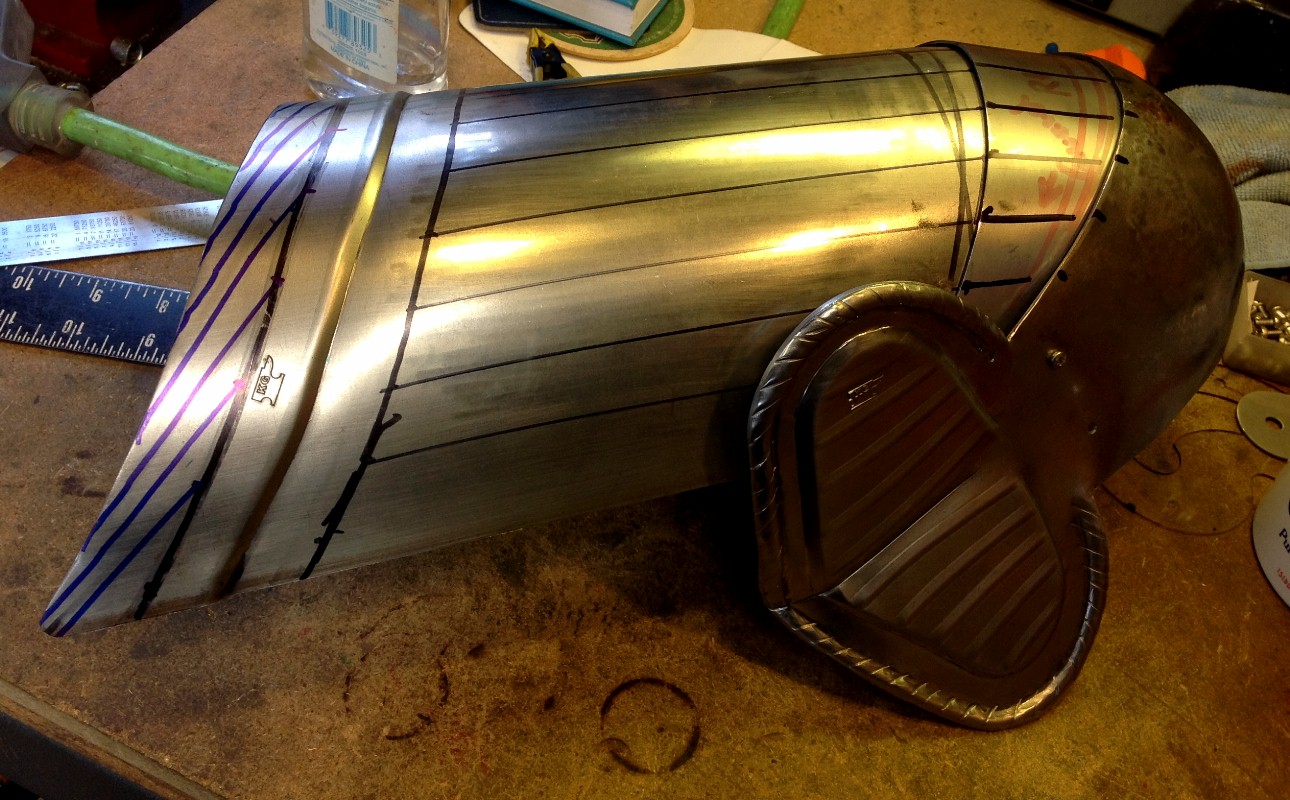
-7 Feb 2015-
Upper cop lame. |
 |
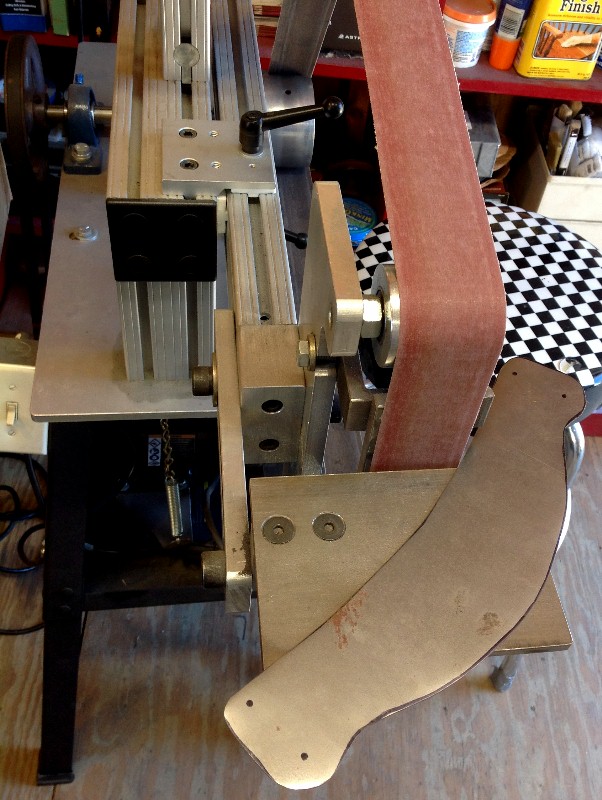
Clean-up on the blet grinder. |
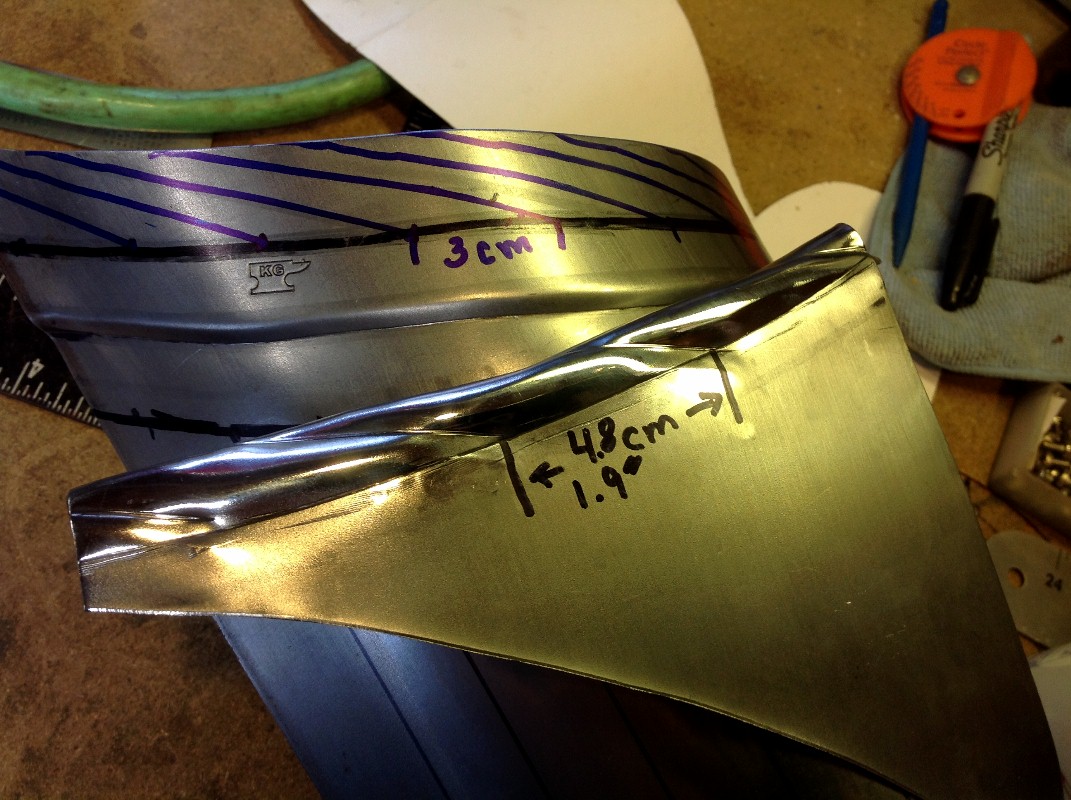
 |
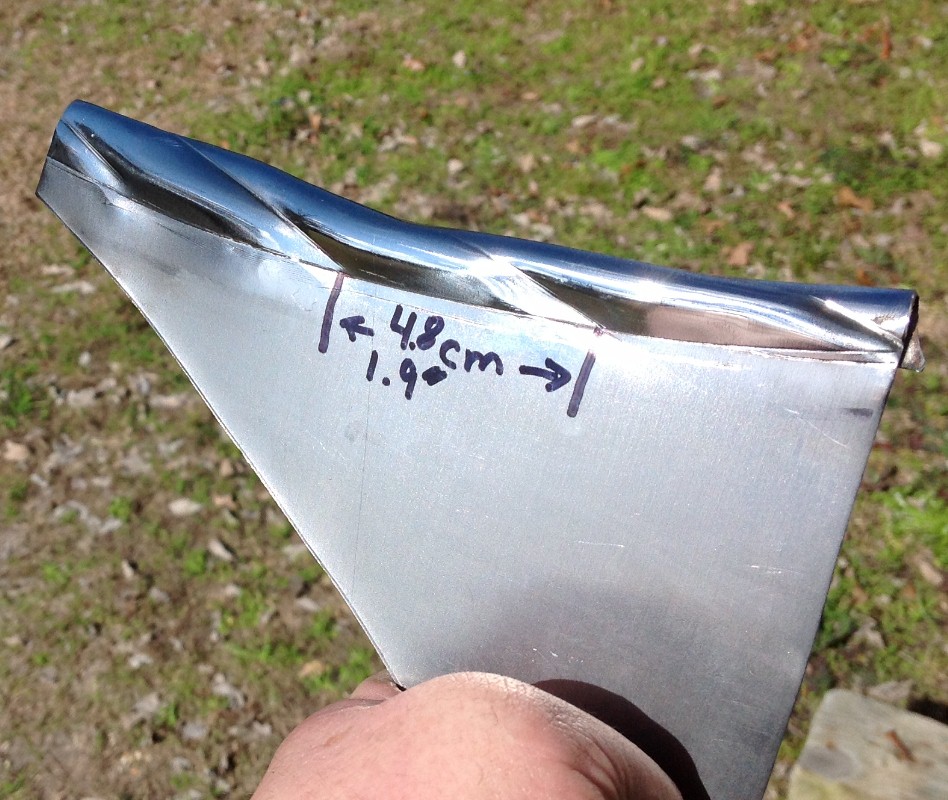
| Spacing of the roping, sample shows 4.8 cm, but we will use 3 cm. |
 |
The English wheel to lift out the cuishe. |
 |
| Placing the Maximilian lines on the cuishe. |
 |
Looking from the top. |
 |
| Side view. |
 |
Garry, per conversation I think 3cm nailed it. |
 |
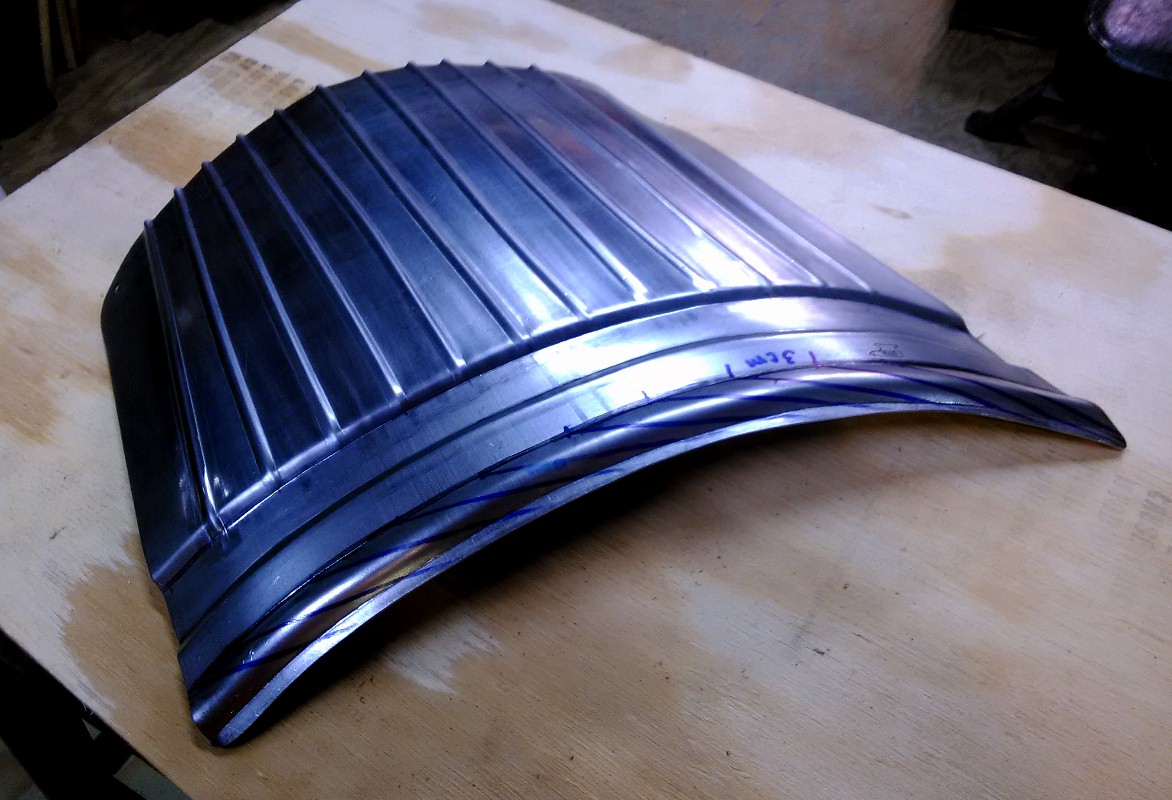
-8 Feb 2015-
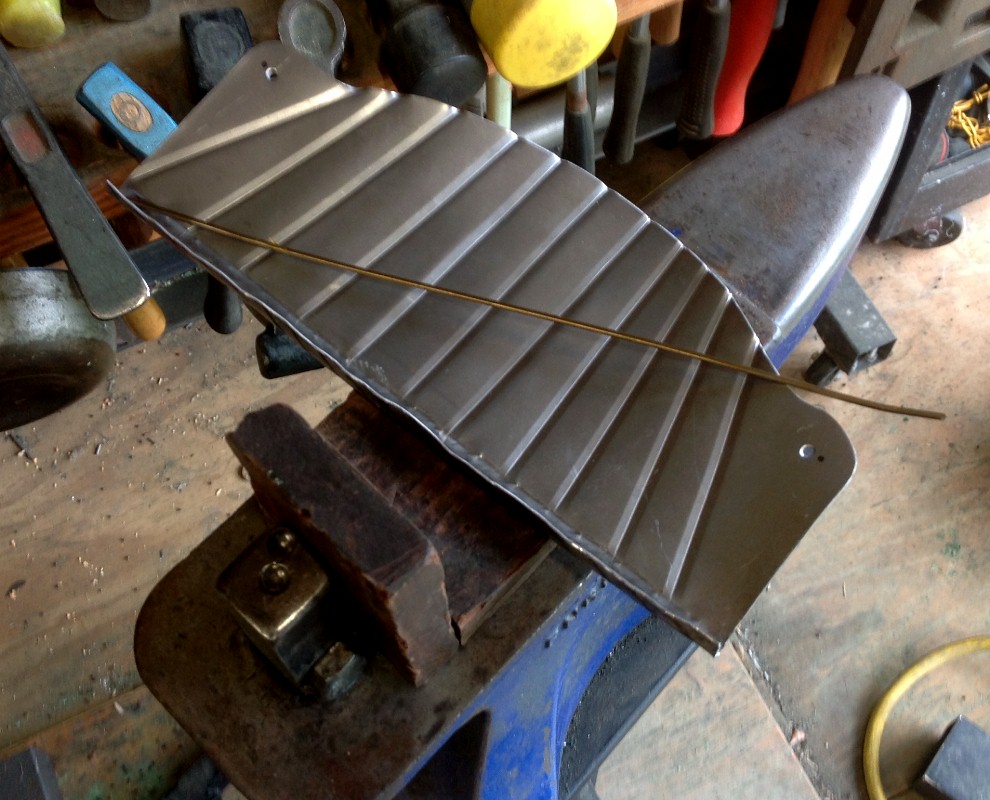
The first Maximilian lines on the cuishe, this is all raw, still need the roping on the top edge. |
 |
I had about a hour of time so I did a bit of work in the shop. |
. |
-9 Feb 2015-
Working on the Cuishe's roping and other thinks. Still have a lot of clean-up to do on these pieces. |
 |
 |
 |
-10 Feb 2015-
The left cuishe ready for the art/decore. |
 |
With the art/decore. |
 |
| The steps to work the art/decore. |
 |
 |
 |
-11 Feb 2015-
The general look and feel of the right cuishe, plus the two new bottom lames. |
 |
 |
 |
-12 Feb 2015-
This is to place the lines into the knee-cop 14ga. |
 |
This is what it does, what that spacing. |
 |
| Some work on the knee-cop. |
 |
Just to see the work, this is raw at this point. |
 |
-14 Feb 2015-
This cuishe is done, now comes the clean-up and strapes. |
 |
Second view. |
 |
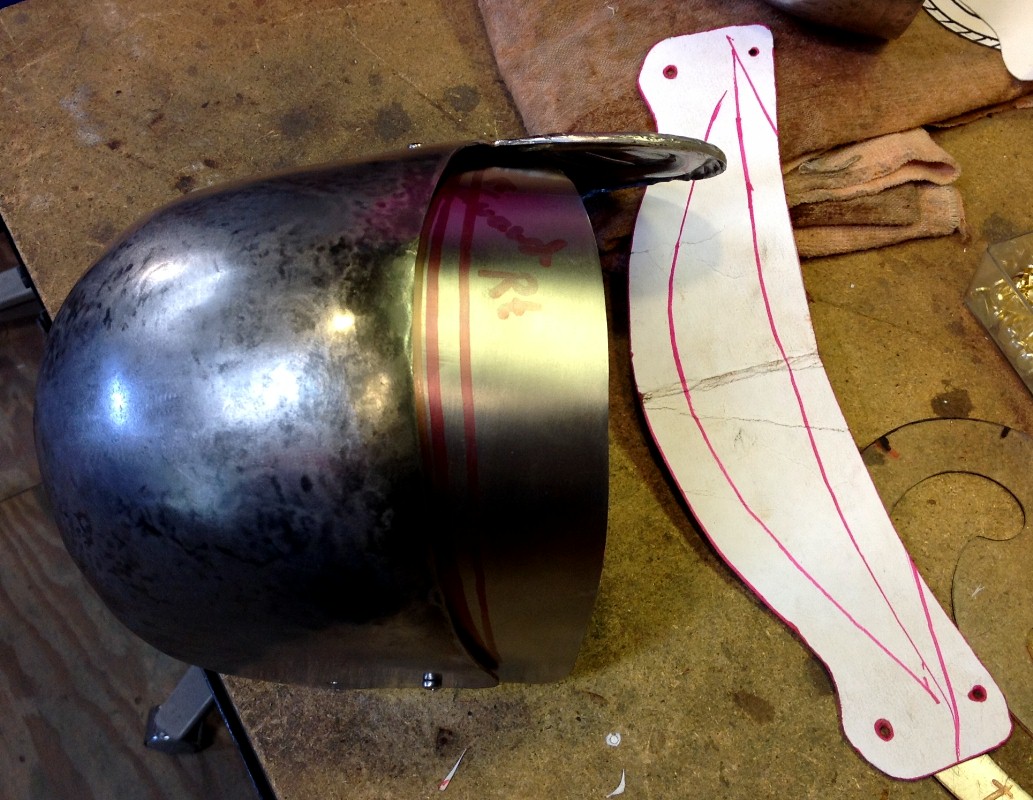
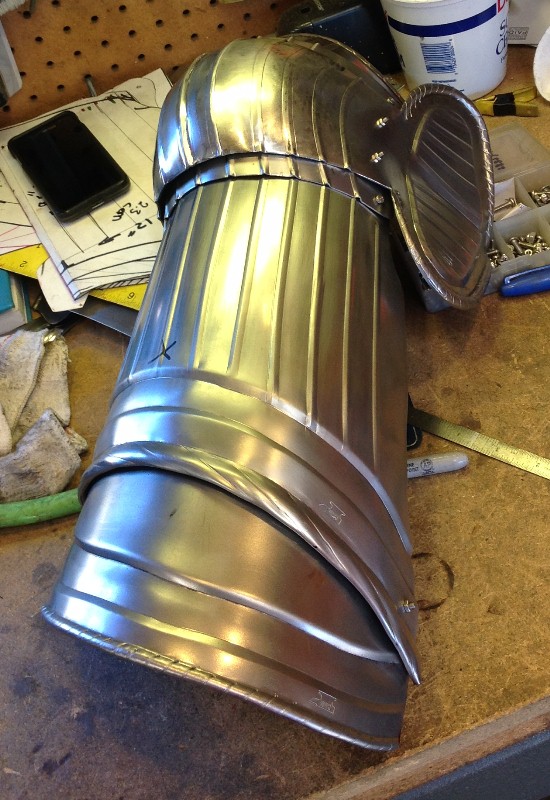
-16 Feb 2015-
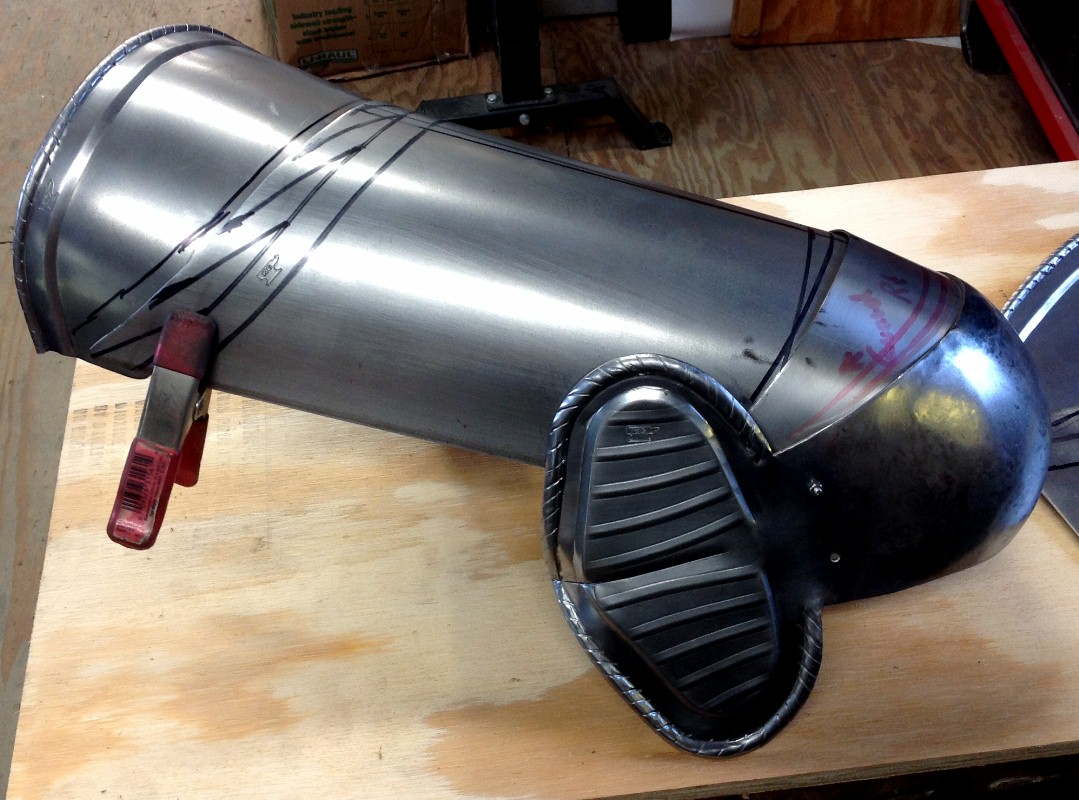
Closer look at the leg armour. |
 |
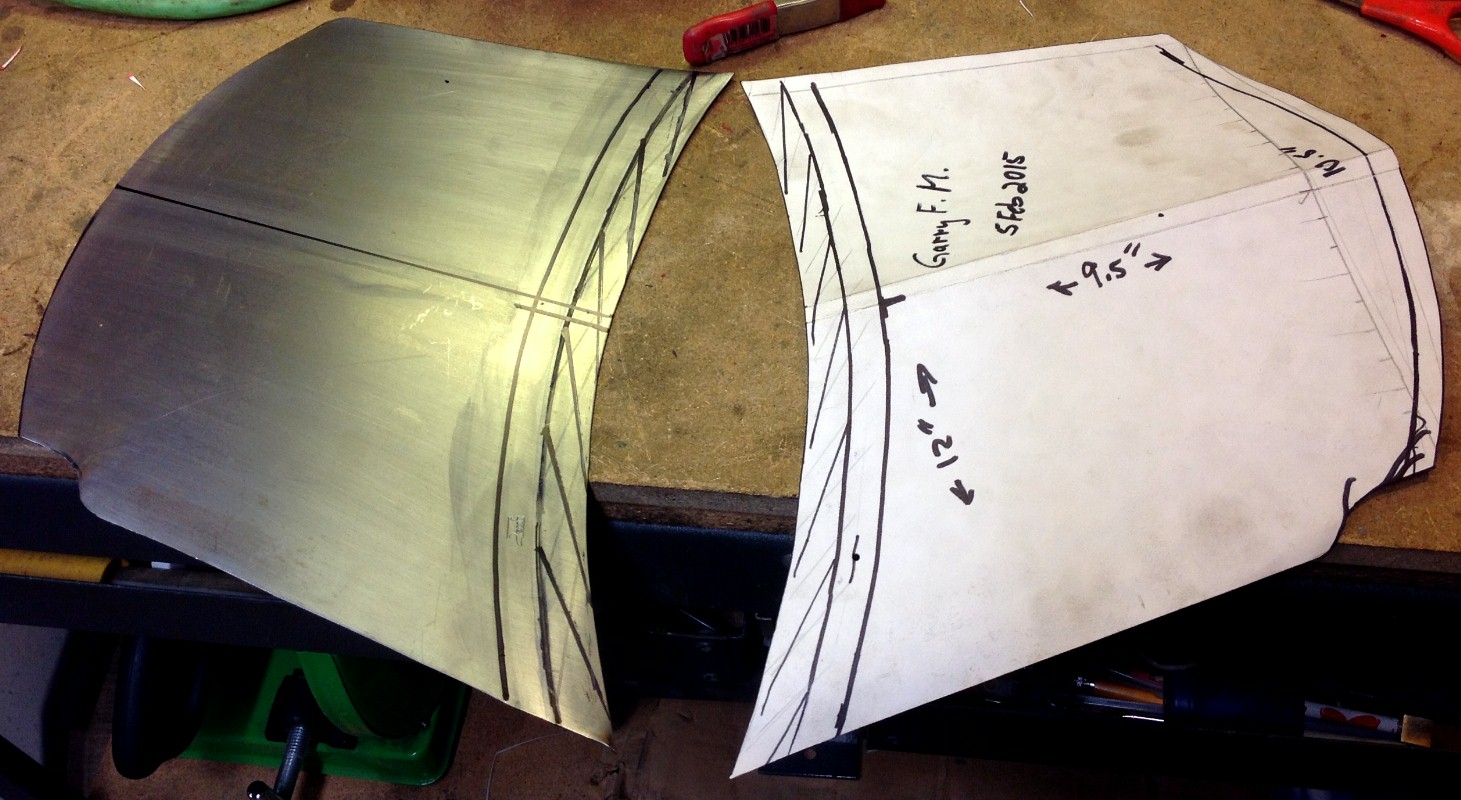
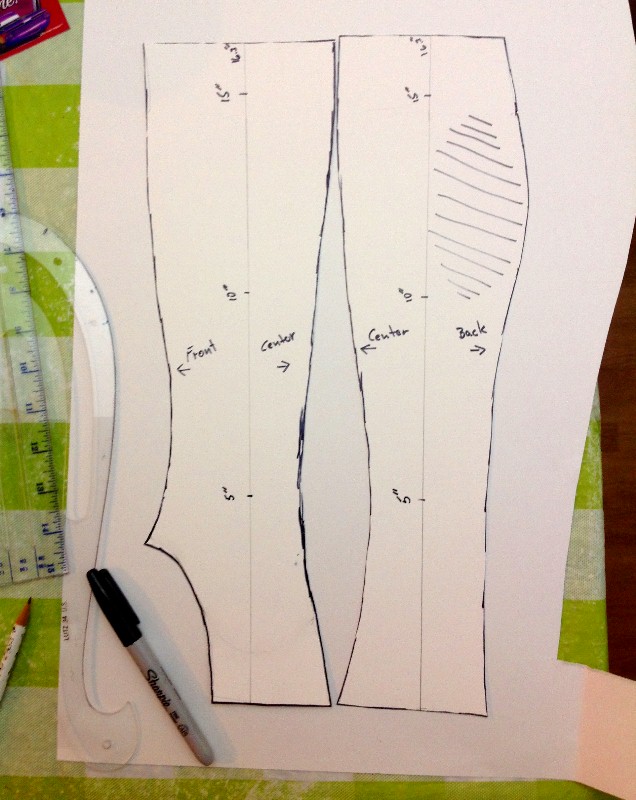
Pattern for the Maximilian greaves. |
 |
-17 Feb 2015-
The greave pattern on the steel, the magnets hold the pattern from moving. |
 |
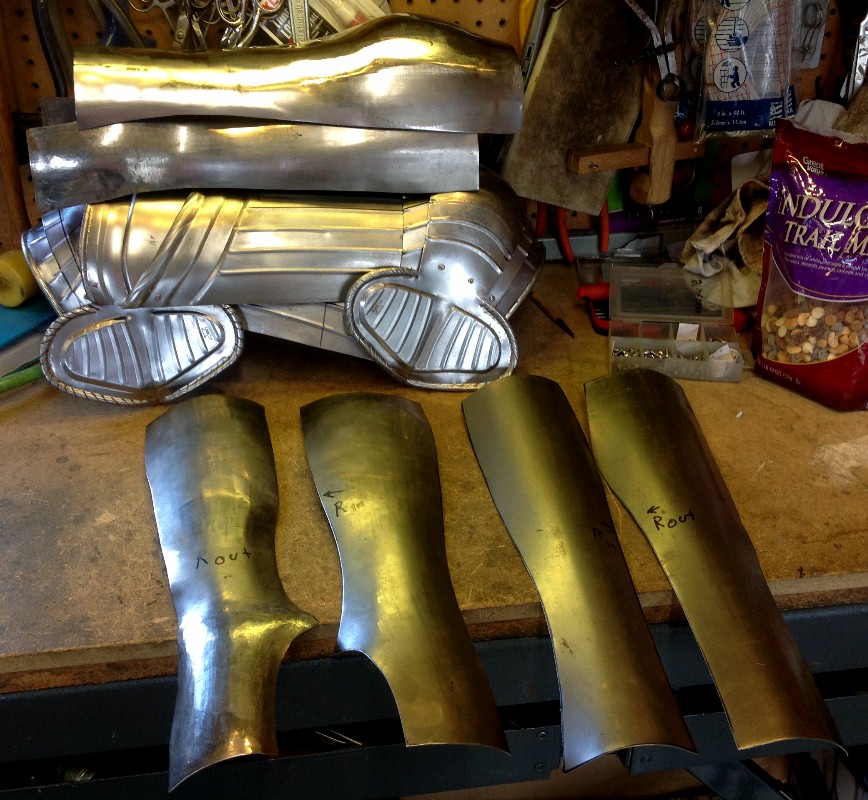
The greaves in steel. |
 |
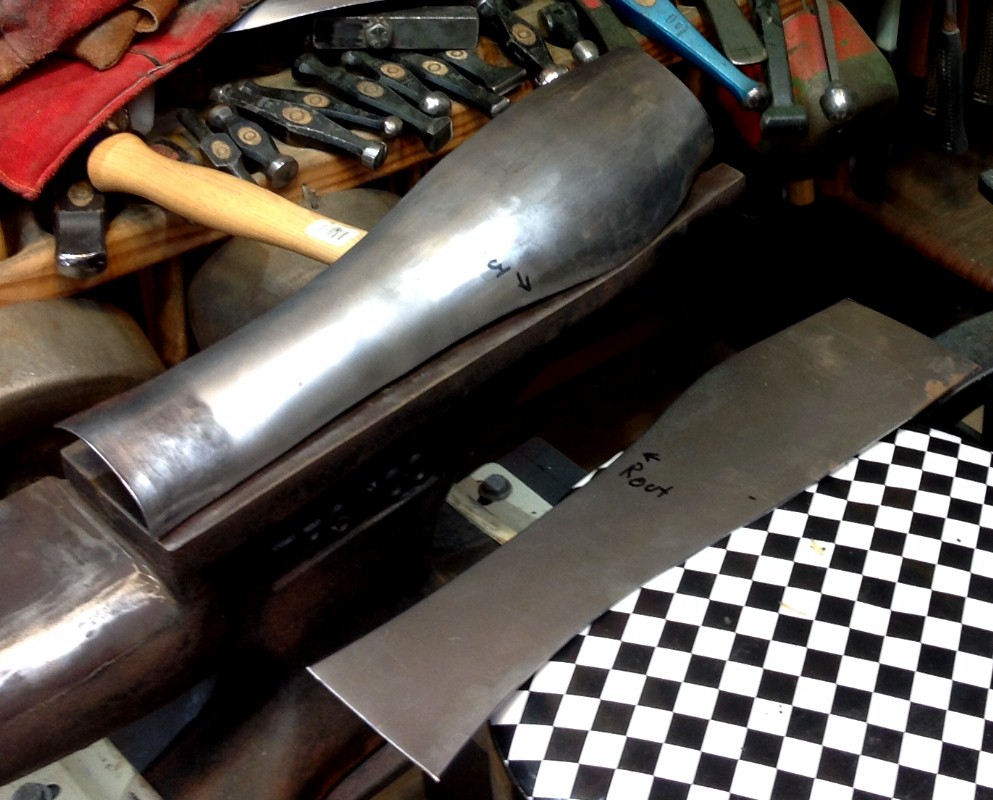
-18 Feb 2015-
Using the Slip roller to get the general shape. |
 |
Using the English Wheel to drive out the muscle. |
 |
| General shifting on the stake. |
 |
The part of the back greave on the anvil. Once the other half is done, I will weld them together. |
 |
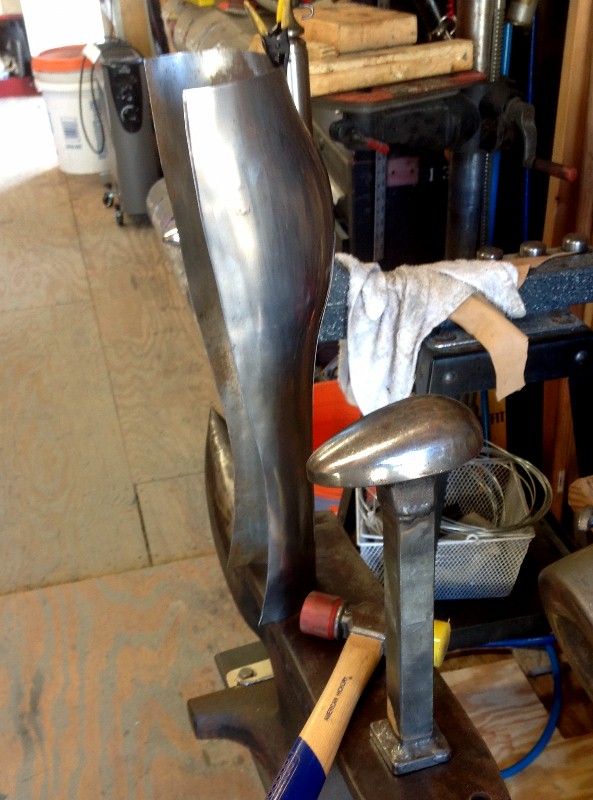
-20 Feb 2015-
The raw back of the first greave, with the heavy form on the calf muscle. |
 |
 |
 |
-23 Feb 2015-
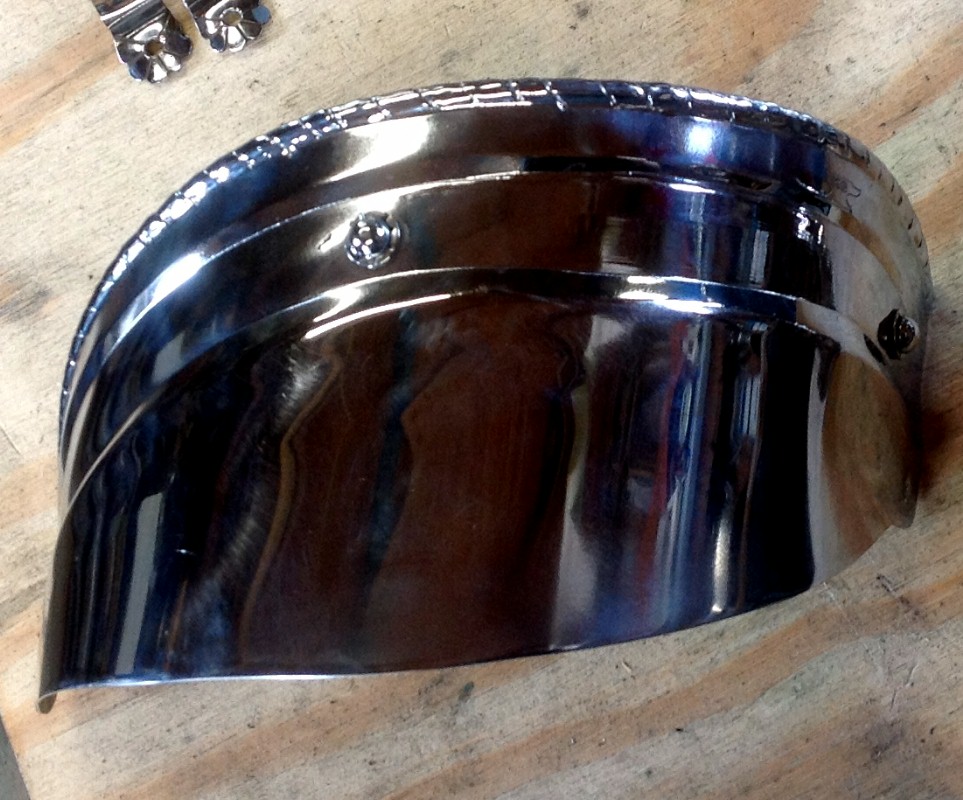
The basic front of the greave. |
 |
The raw work of both sides, still have some more shaping to do. |
 |
-26 Feb 2015-
Shaping the greave. |
 |
Using the stake to line up the greave. |
 |
| Final line up. |
 |
After the main weld. |
 |
-27 Feb 2015-
Working on the left Cuishe. |
 |
. |
. |
-28 Feb 2015-
Rolling the main lame of the cuishe. |
 |
Working on the left leg. |
 |
-2 Mar 2015-
Working on the left Cuishe's lames. |
 |
-3 Mar 2015-
Working on the left greaves. |
 |
-4 Mar 2015-
The first lineup of the left greave. |
 |
Just a bit more to push this into place. |
 |
-6 Mar 2015-
The left front greave is welded. |
 |
. |
. |
-7 Mar 2015-
The left back greave raw. |
 |
The 0n the English Wheel to bring out the calf. |
 |
| The work over time to bring the parts together. |
 |
The side view. |
 |
-9 Mar 2015-
The last of the greaves. |
 |
Second view at this point. Need to make the hinges next. |
 |
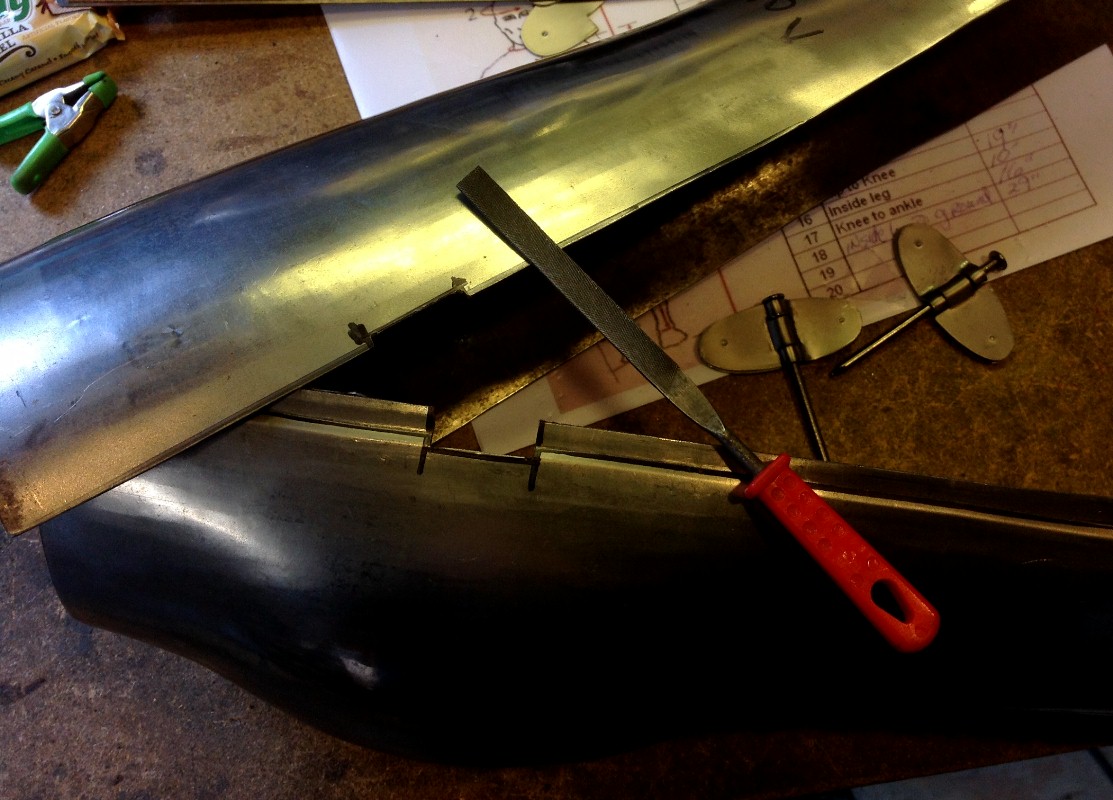
-10 Mar 2015-
Making the hinges for the greaves. |
 |
 |
 |
-11 Mar 2015-
Start on aligning the greaves. |
 |
 |
 |
-13 Mar 2015-
The shaping of the hinges. |
 |
Filling out the opening for the hinge. |
 |
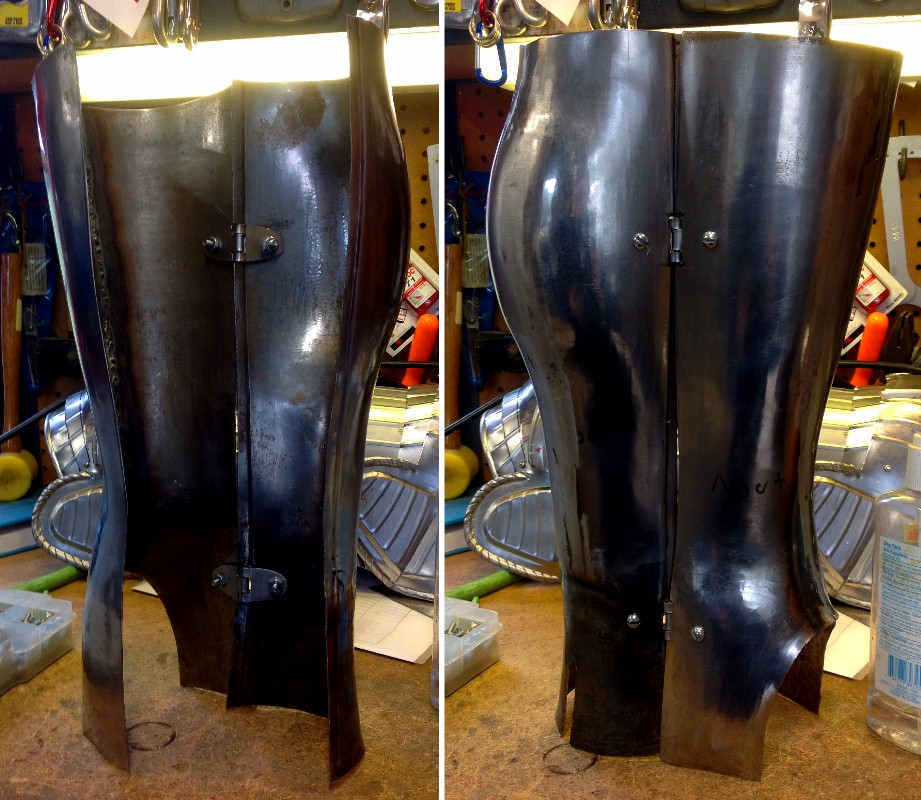
| View from the inside and out of the hinge. |
 |
The view of the hinge on the outside, there is something ... I don't know, something sexy about that picture? |
 |
| Inside, outside view. |
 |
View of both hinges on the outside. |
 |
-14 Mar 2015-
Finished the hinges and the basic aligning of the greave. |
 |
-16 Mar 2015-
It taken much longer to align the greave to make the hinges move smooth. |
 |
-17 Mar 2015-
The greaves with the size pattern. |
 |
Maximilian cow mouth sabaton tip. |
 |
| The sabaton toe just a few views and the armor so far. |
 |
 |
 |
-19 Mar 2015-
New pattern the original was just a bit small. |
 |
The new toe has a extra 1 inch all around. |
 |
| The old and new pattern / toe, so one can see the difference. This should work much better for the user. |
 |
Side view. |
 |
| The old toe in the new. |
 |
Side by side. |
 |
-20- Mar 2015-
Working on the second toe. |
 |
The left and right toe. |
 |
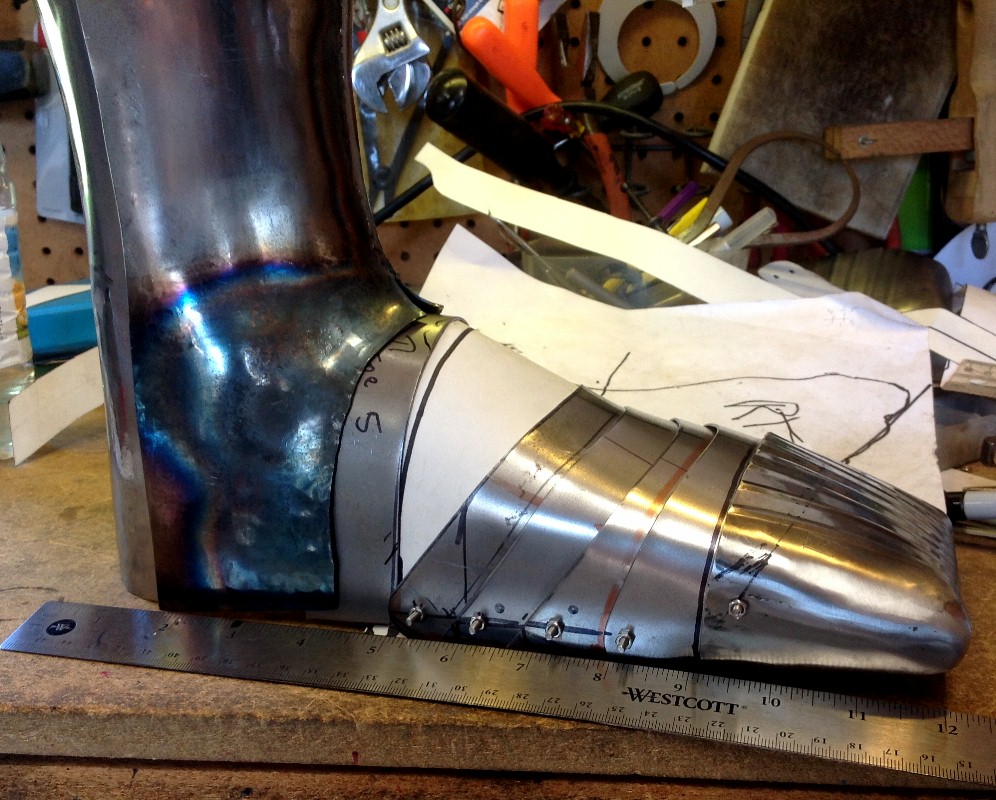
-21- Mar 2015-
The general size / idea. |
 |
Basic pattern. |
 |
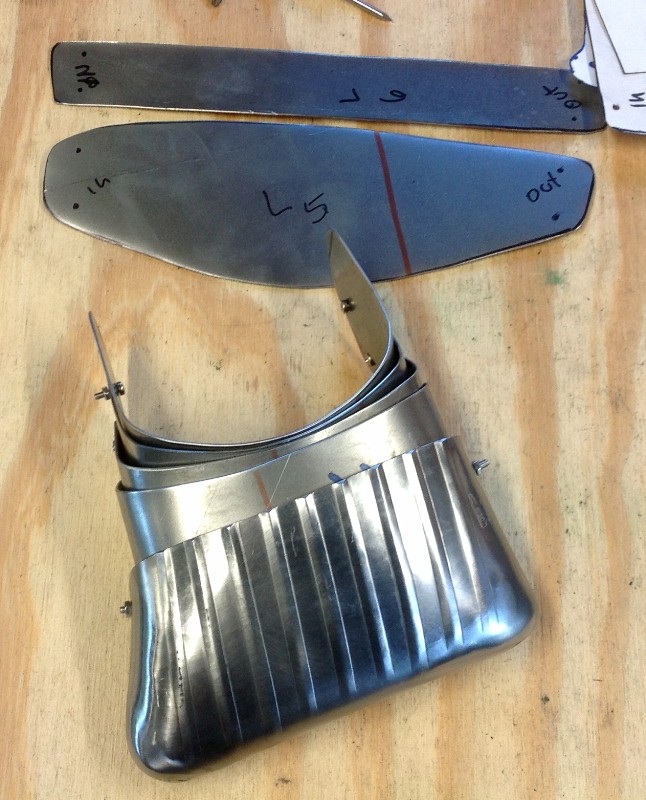
| The lames design. |
 |
How they will look and work together. |
 |
-24- Mar 2015-
Articulation of the first lame. |
 |
Inside view. |
 |
| General look, need to re-shape and tune some lames. |
 |
Video of the lame movement. |
 |
-27 Mar 2015-
Did not like what I did before, this is a better design. |
 |
 |
 |
-28- Mar 2015-
General view, they are not tuned at this time. |
 |
Once I am done, they will be shaped to flow with the foot. |
 |
-30- Mar 2015-
First lame fom the greave. |
 |
The sabaton not tuned at this time. |
 |
| The sabaton at about 20 degree down. |
 |
The sabaton bend up. |
 |
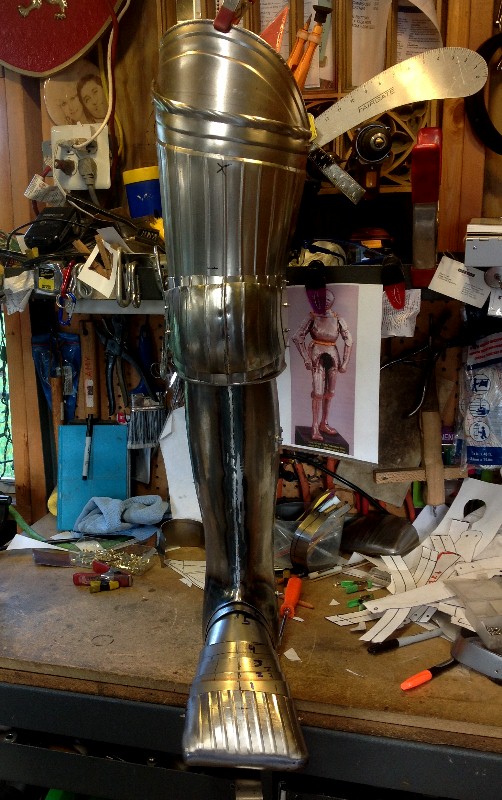
| This is the first time for a general look of a whole leg armor, front view. |
 |
Side view. |
 |
-31- Mar 2015
Starting some clean-up work. |
 |
. |
. |
-2- Apr 2015-
The last pattern with all the changes. |
 |
The hinges are TIG welded now, they are very strong. |
 |
| The parts which make-up the latch on the side of the greave. |
 |
The look on the open latch. |
 |
| The look on the closed latch. |
 |
The over all look from the side, I will make the bottom latch tomorrow. |
 |
-3- Apr 2015-
The pattern on the steel. |
 |
The last part of the armor, the left sabaton. Worked on the left greave to make the opening larger, had to hot work that. Installed the bottom latch on the right greave |
 |
-4- Apr 2015-
Working on the last part of the armor. |
 |
 |
 |
-6- Apr 2015-
The basic leg harness is done. |
 |
Now comes the clean-up,
oh joy, oh joy ...! |
 |
-8- Apr 2015-
Clean-up on the knee-cop plus the rest of the lines. |
 |
Micro welding the ridge. |
 |
-9- Apr 2015-
The new bottom lame of the cuishe. |
 |
Showing the lines for the roping. |
 |
| Burring the rope line. |
 |
Placing the wire into the burr. |
 |
| Just showing the steps to get to the end of the new lames. |
 |
 |
 |
-10- Apr 2015-
TIG welded the hinges from the left greave. |
 |
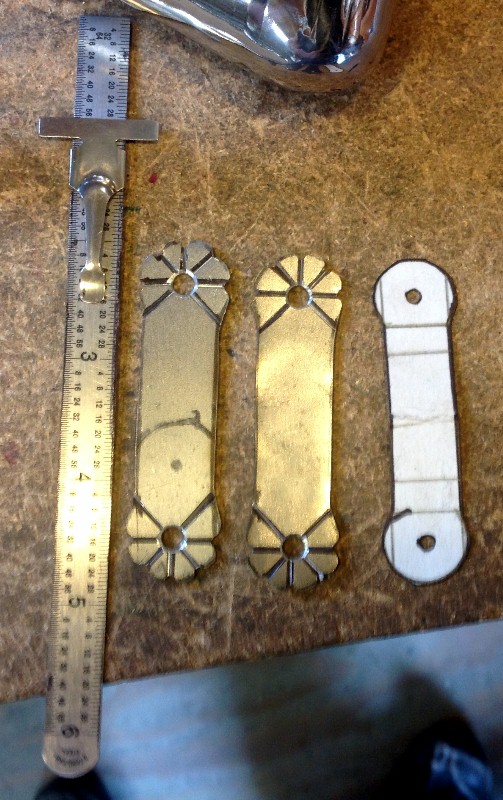
The strap holder for the back of the greave. |
 |
| The strap holder how to shape it and the general look. |
 |
 |
 |
-11- Apr 2015-
Cut the back of the greave. |
 |
The Knee-cop after the the first cleaning. |
 |
| The cuishe holders (D-Rings) on the last lame. |
 |
 |
 |
-13- Apr 2015-
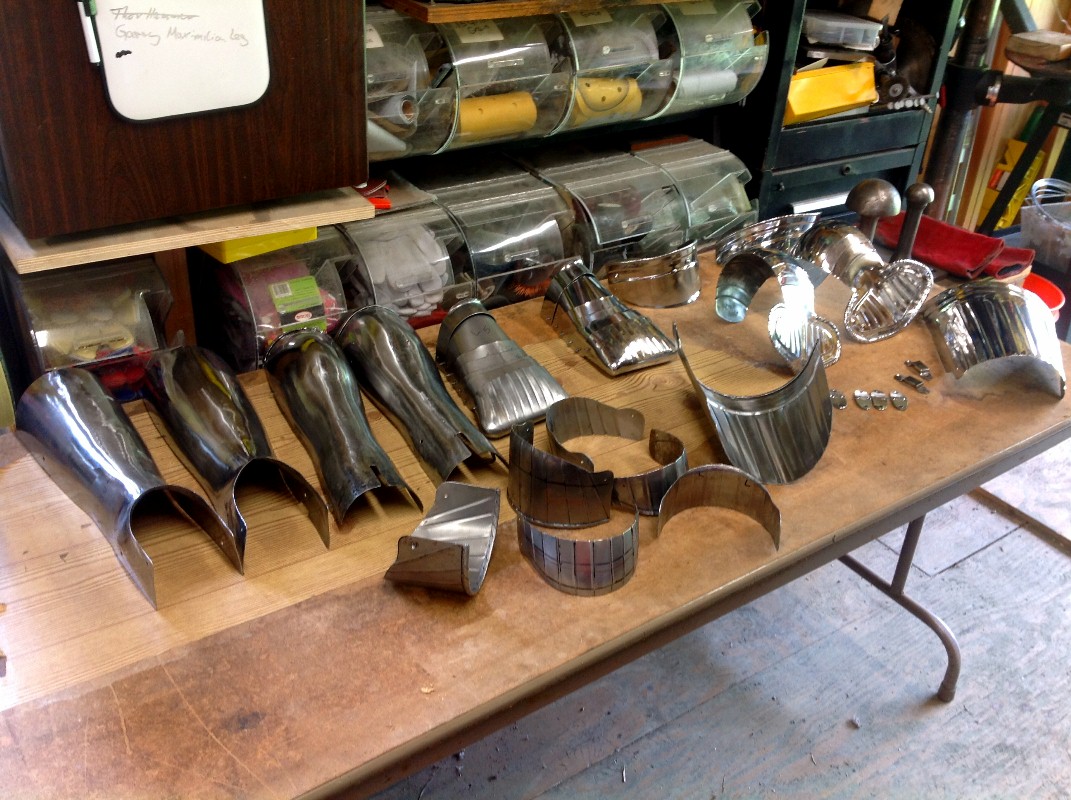
The leg harness at the start of the day. |
 |
Amy cleaning each piece and placing carnuba wax on the armour. |
 |
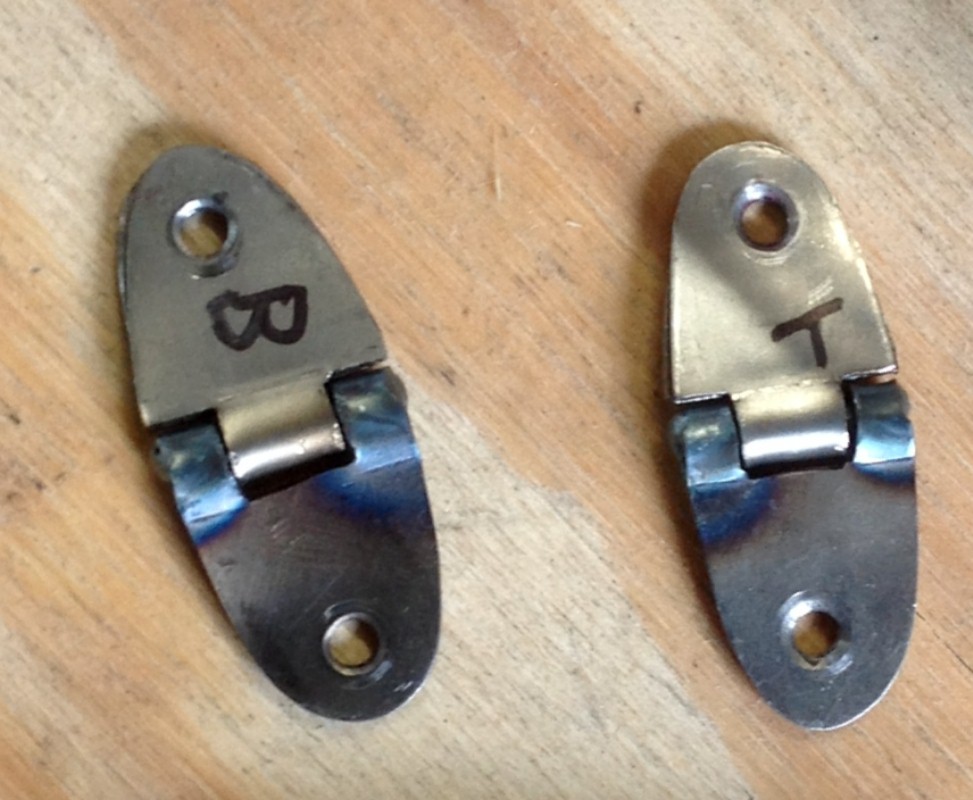
| The hinges cleaned and marked. |
 |
The end of day 1 of the clean-up task. |
 |
-14- Apr 2015-
This is my rivet spacer to get the correct play. |
 |
More cleaning, one piece at the time. |
 |
-15- Apr 2015-
Had a tough time setting all the rivets on the greaves, just no space to use a hammer. |
 |
Side project: Copy of two nails from the crucifiction. |
 |
-16- Apr 2015-
Amy cleaning and placing carnuba on the sabatons. |
 |
We are almost done, just some more cleaning and the straps. |
 |
-17- Apr 2015-
The leather Y strap on the back of the cuishe. |
 |
Placing the buckle. |
 |
| Mounting the straps on the leg harness. |
 |
 |
 |
-18- Apr 2015-
The final cleaning. |
 |
Just another view. |
 |
| Dad in the leg harness #1 view. |
 |
Dad in leg harness #2 view.
The End |
 |
| The last pictures before shipping to California. |
 |
The final picture from Gary. |
 |